How Do I Upload My Own Fonts to My Wordpress Website?
Choosing a font is a bang-up way to add a unique look to your site. To change your fonts, yous will employ a unlike selection that depends on which theme you are using:
Table of Contents
Changing Fonts with the Site Editor
If your site uses a theme that supports the Site Editor, y'all tin can change your site's fonts with the Typography settings accessible from the Styles button in the Site Editor.

↑ Table of Contents ↑
Irresolute Fonts with Global Styles
If your site uses whatsoever of these themes, yous tin can utilize Global Styles to change the font of your site
- In your dashboard, click on Pages.
- Click on the Add New button, or click on an existing page title to open it in the WordPress Editor.
- If adding a new page, select your preferred layout or the default Blank layout.
- In the editor, click the Global Styles button. It's the "Aa" button located between the Settings icon and the green Jetpack push.
- Click the drop-down under Headings or Base of operations Font to encounter what font options are available.
Fonts are set in pairs, one for headings and the other for the base font.
- Heading Font: Choose a font to use for all of the headings on your blog. Common examples of heading text include mail service and page titles, widget titles, annotate headers, and headlines inside posts and pages.
- Base Font: Cull a font to utilize for the main body text and for the menus on your blog.
In the Global Styles carte du jour, click Publish to salve your new font pairings, or Reset to revert the changes.
Publishing your changes in the Global Styles menu will not publish the specific page you are working on.
Adjusting Font Size
The Cake Editor provides options for changing the font size within individual blocks.
To change the heading font size, select a different heading (H1, H2, etc) in your heading block.

Paragraphs, buttons, and other text blocks have a Typography option in the Block Settings where yous can change the size of the text to a Preset size, or type in a custom font size.
✅
If you don't see the Cake Settings menu on the right side of your screen, click the cog icon next to your "Update" or "Publish" push to open the menu.

↑ Table of Contents ↑
Changing Fonts in the Customizer
Many themes have options to change the font by going to Appearance → Customize. If you don't run into font options in the Customizer, cheque to see if your theme supports the Global Styles method of changing fonts.
- From your dashboard go to Advent → Customize.
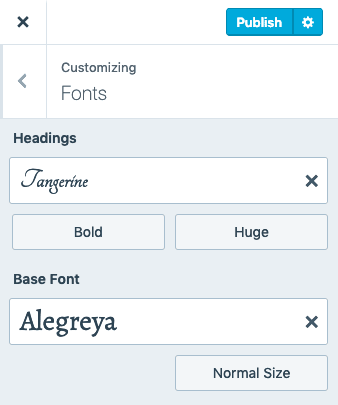
- Click on the Fonts pick in the Customizer.
- Click the drib-down under Headings or Base Font to see what font options are available.

Fonts are fix in pairs, one for headings and the other for the base font.
- Headings: Choose a font to use for all of the headings on your web log. Common examples of heading text include post and page titles, widget titles, comment headers, and headlines inside posts and pages.
- Base Font: Choose a font to use for the master body text and for the menus on your blog.
Each time yous modify a font, the alive preview refreshes and so you tin can see how that font volition expect on your blog.
Adjusting Font Size and Manner
Font style – To adjust the manner of your heading fonts, click the option beneath and to the left of the font. The available styles volition vary depending on the font you have called.
Font size – To accommodate the size of either your heading or your base fonts, click the size selection below and to the right for each selected font and select a size from the dropdown menu.
💡
You can alter the global default font sizes with custom CSS.
Saving Fonts
Once yous are satisfied with your font selections, Publish your site, or Relieve Draft if you want to continue to customize your site before publishing it.
Irresolute Fonts
Once you've selected your custom fonts, yous can alter them every bit many times as yous desire.
To change the custom fonts you employ, go to Appearance → Customize → Fonts and select a different Header or Base Font. Or, you tin switch back to your Theme'south default font by clicking the X to the right of the custom font proper noun.
In one case you are satisfied with your changes to the fonts, click Publish or Save Draft to go on customizing your site.

📌
It may take a few minutes for your fonts to evidence up on your blog or site after you save them. You lot may likewise want to clear your browser's cache to be sure you're viewing the latest version of your site.
Resetting Fonts
To reset your fonts to the theme'due south defaults, you can exercise so by clicking the Ten adjacent to your current font.
- Get to Advent → Customize
- Click Fonts.
- Click the 10 next to the custom font to reset the font to the theme's default.
- Click Save Changes.
↑ Table of Contents ↑
Use a Font to Specific Text
When choosing fonts, you'll see options to set the fonts for your overall site, non for private pages or a specific line of text. This is a best practice when it comes to blueprint — websites look best when there is consistency with the fonts across the unabridged site. If a site had a bunch of dissimilar fonts, information technology could get unwieldy.
If your goal is to brand a piece of text stand up out, consider other means of doing so such equally applying dissimilar colors, using a Quote block, or inserting an image.
↑ Table of Contents ↑
Using Custom Fonts
You can utilise a plugin that installs more than fonts on your site. There is a broad range of plugins that will allow y'all to add your ain fonts to your site. So when reviewing plugins, check the ratings, the number of positive comments, and the blazon of support yous can expect from the Plugin Developer. If you lot decide not to use a plugin later on testing it, make certain to deactivate/delete it to keep your plugin listing clean.
↑ Table of Contents ↑
Oftentimes Asked Questions
Tin I connect a Typekit.com account to my WordPress.com site?
It is not possible to connect an exterior Typekit.com account to a WordPress.com site or blog.
Will the fonts display in my linguistic communication?
If y'all have selected a non-Latin language for the blog under Settings → General, and so all of the custom font's characters will be loaded. If you have selected a Latin language such as English, Italian, Portuguese, or Spanish, then only a smaller subset of the font volition be loaded. If some characters aren't displaying correctly on your blog, please check the linguistic communication settings first to make sure yous accept selected the language you are writing in and then go to your Customizer → Fonts and re-save the font to make information technology update to your new language setting.
How can I tell if the font I want to use is supported for my language?
The best fashion to check if a particular font volition display properly in any given linguistic communication is to try that font in the Customizer and see if the font changes from the theme default. Currently, no Asian languages are supported, and Cyrillic is supported in nigh, just not all, font families. Wider linguistic communication support is an area that will continue to grow and better in the future.
Why does a unlike font briefly appear before my chosen font appears?
This is called Flash of Unstyled Text (FOUT). On slower connections, text is displayed in the theme's default font showtime. This mode, people tin start reading your content before your custom font loads, instead of waiting while looking at a blank page. This might hateful that in that location'southward a flash of a different font before the folio finishes loading, simply overall this is better for viewers on slower connections than seeing a blank screen. If you don't want this to happen, yous can add this CSS code to your site using the CSS Editor in Appearance → Customize → Boosted CSS (Pro plan only): .wf-loading body { visibility: hidden; }
oppenheimerscaughbod.blogspot.com
Source: https://wordpress.com/support/custom-fonts/
0 Response to "How Do I Upload My Own Fonts to My Wordpress Website?"
Post a Comment